

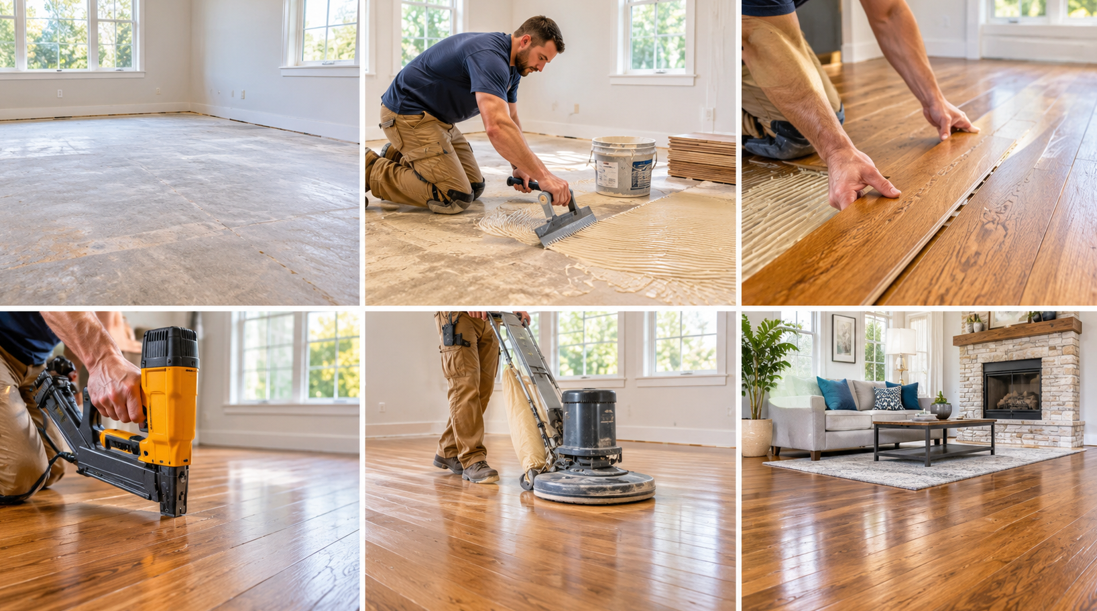
New hardwood floors can transform a home, but many Bixby homeowners hesitate because they are unsure what the installation process involves. How long will it take? Will the house be livable during the work? What happens to the old floor? At Brucke Flooring, we believe a clear plan removes the guesswork. This guide walks you through each stage of a professional hardwood installation, so you know exactly what to expect from the first visit to the final walkthrough.
Step 1: The In-Home Consultation and Estimate
Every project starts with a conversation. During the consultation, our team visits your home to understand your goals, measure each room and look at the existing floors and subfloor.
We will talk through:
The rooms you want to cover and how you use them
Your style preferences, from wide plank white oak to warm natural tones
Whether solid or engineered hardwood suits your home best
Your timeline and any important dates, such as holidays or family events
Pets, children and traffic levels that affect species and finish choices
At the end of the visit, you receive a free, detailed estimate. Brucke is a BBB Accredited Business, and we pride ourselves on clear, upfront communication.
Step 2: Choosing Your Hardwood
Selecting the right floor is one of the most enjoyable parts of the process. Our Tulsa showroom lets you see and feel samples in person, which is far more helpful than looking at photos online.
Solid vs. Engineered Hardwood
Solid hardwood is milled from a single piece of timber and can be refinished many times over its life. Engineered hardwood has a real wood top layer bonded to a stable core, which makes it more resistant to changes in humidity. Engineered boards are often recommended for homes on concrete slabs, which are common across the Tulsa metro.
Species and Finish
Oak, hickory and maple are popular choices. Harder species resist dents better in busy homes. Finishes range from matte to gloss, with matte and satin sheens leading current trends because they hide minor scratches well.
Step 3: Acclimation
Oklahoma's climate swings from humid summers to cold, dry winters. Wood naturally expands and contracts with these changes, so hardwood needs time to adjust to your home's conditions before installation.
During acclimation:
Flooring is delivered to your home and stored in the rooms where it will be installed
Your heating or air conditioning runs at normal living levels
Our team checks moisture content in both the wood and the subfloor
Skipping acclimation is one of the most common causes of gaps, cupping and buckling after installation. We never rush this step.
Step 4: Preparing the Space
Before installation day, you will want to clear the rooms of furniture, rugs and fragile items. Our team can advise on what to move and how to protect nearby spaces.
On the day, preparation includes:
Removing old flooring, carpet, tack strips or tile
Removing baseboards or shoe molding where needed
Protecting doorways and adjacent rooms from dust
Step 5: Subfloor Inspection and Leveling
A beautiful floor depends on a sound base. We inspect the subfloor for moisture, damage, squeaks and uneven areas. Low spots may be filled, high spots sanded down, and loose areas secured. On concrete slabs, we test moisture levels carefully and install the right vapor barrier.
Step 6: Installing the Hardwood
This is where your new floor comes to life. The installation method depends on your subfloor and the type of hardwood you choose:
Nail down. Common for solid hardwood over a wooden subfloor.
Glue down. Often used for engineered hardwood over concrete.
Floating. Engineered boards click together over an underlayment without being fastened to the subfloor.
Our installers plan the layout carefully, mixing boards from different boxes for a natural look and leaving proper expansion gaps around the edges. Our hardwood floor installation team brings specialist hardwood experience to every room, from straight runs to detailed transitions at doorways and stairs.
Step 7: Sanding and Finishing (Site-Finished Floors)
If you choose unfinished hardwood, the boards are sanded smooth after installation, then stained and sealed on site. This allows a fully custom color and a perfectly flat surface. Prefinished hardwood skips this stage, which shortens the timeline and means you can walk on the floor sooner.
Step 8: Trim, Cleanup and Final Walkthrough
Once the floor is down, baseboards and transitions are reinstalled or replaced. We clean up thoroughly, removing debris and packaging. Then we walk through the finished floor with you, answer questions and explain how to care for it.
How Long Does Hardwood Installation Take?
Timelines vary based on the size of the project and the type of flooring. As a general guide:
Acclimation often takes several days
Installation of prefinished flooring in a few rooms may take one to three days
Site-finished floors need extra time for sanding, staining and drying
We will give you a clear timeline during your estimate, so you can plan around it.
Expert Tip: Plan Around the Seasons
In Oklahoma, autumn and spring offer the most stable indoor humidity, which makes them ideal times for hardwood installation. If you are planning new floors before holiday guests arrive, booking your consultation early in the autumn gives plenty of time for acclimation and installation without rushing.
The White Glove Difference
Our "White Glove Treatment" means we treat your home with care and keep you informed at every step. We protect your space, explain each stage clearly and take pride in the details, from tight seams to clean transitions.
Start Your Bixby Hardwood Project
New hardwood adds warmth, character and lasting value to your home. With a clear process and an experienced local team, the journey from consultation to finished floor can be smooth and enjoyable. Brucke serves Bixby and the wider Tulsa area from our showroom at 8716 South Peoria Avenue, Tulsa, OK 74132. Call (918) 599-8100 or visit us to browse hardwood samples in person. We are here to help you plan every step, so book your free estimate today.


